Groups are how you segment your team within Elevate. This mainly helps with
- consuming data on Dashboards,
- creating assignments for your QA team,
- downloading reports; and
- creating roles with custom access
Note - We currently cannot sync with your existing structure present in Virtual Teams.
Creating a Group
- From your User Management tab, navigate to the Groups page and click on Add Group.

- Name your group and optionally, give it a description. eg: Region

- Name your first sub-group and click on Add.

Similarly, create all the required sub-groups. It is important to note that users are mapped to sub-groups and by relation, to a group.
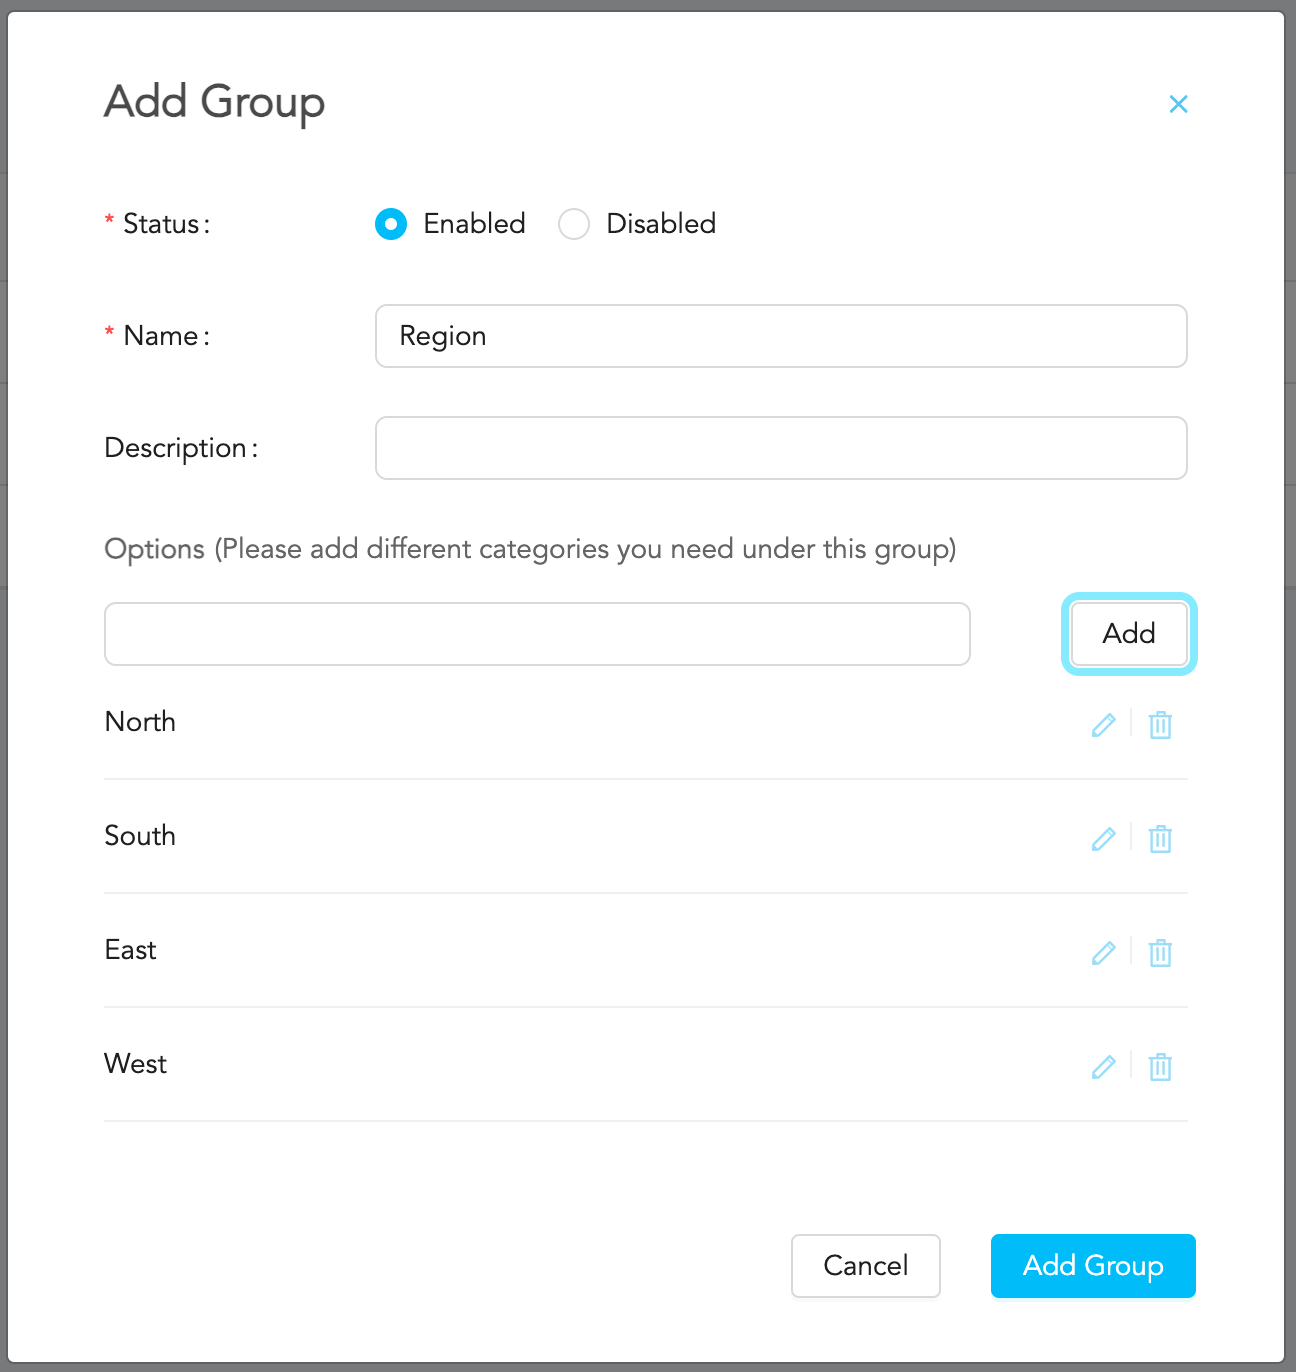
Once you are done, click on 'Add Group'.
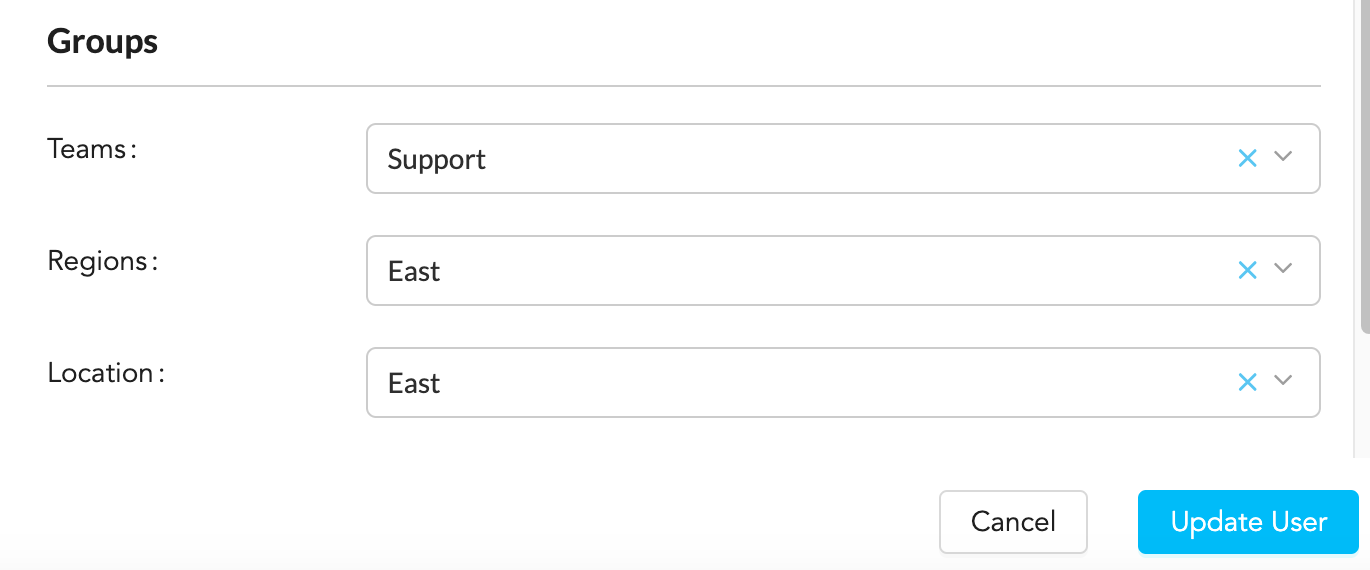
From here, you must now map your users to the newly made group. To do this, navigate to the Users page within User Management.

This is also what you would do to add users to any existing groups.
Click on the user that you want to assign, then scroll down to the Groups section and select the required sub-group from the dropdown against the Group that you just created.

Repeat the above step till you have added the user to all the required sub-groups. Then, click on 'Update User'.
Repeat the same steps for all your other users to add them all to Groups. If you have a lot of users to update and cannot do so manually, please reach out to support and we'll bulk import them for you.Note - A user can only be a part of one sub-group within the same group
Was this article helpful?
That’s Great!
Thank you for your feedback
Sorry! We couldn't be helpful
Thank you for your feedback
Feedback sent
We appreciate your effort and will try to fix the article